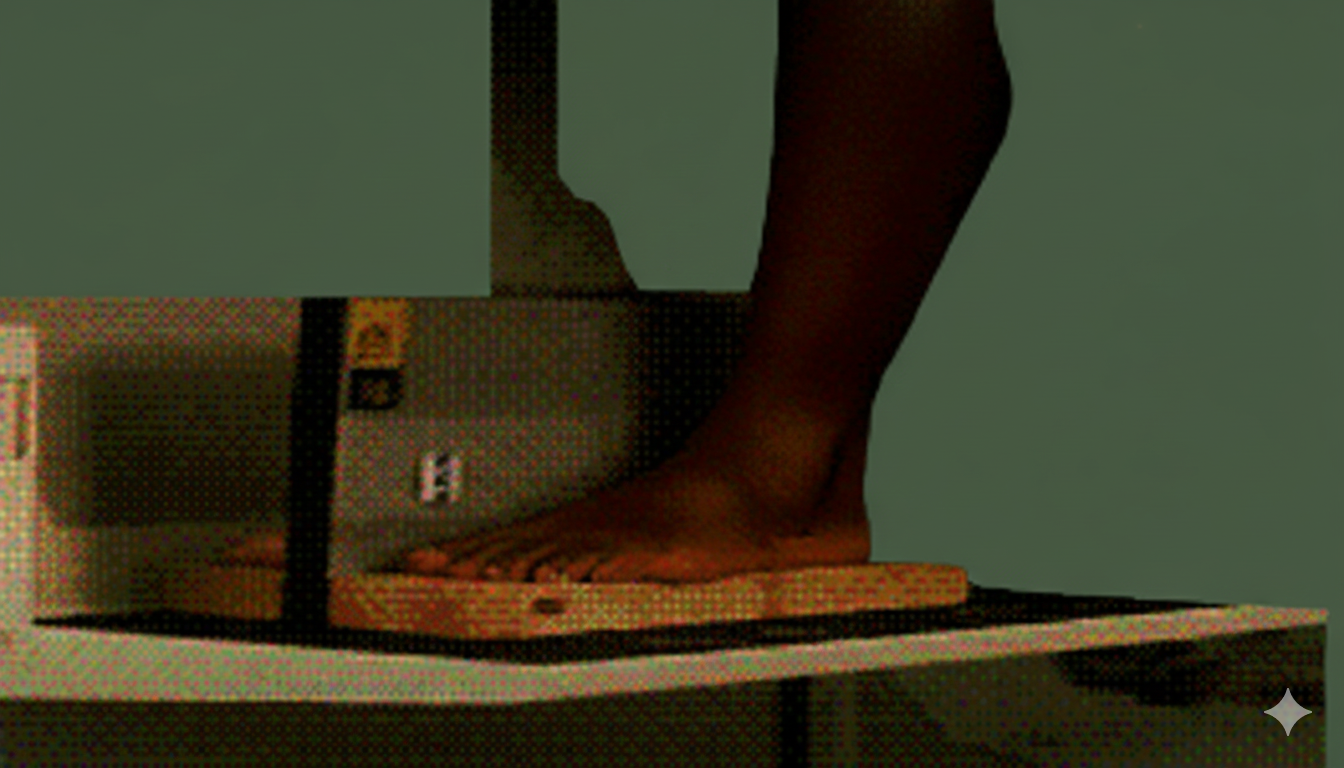
WEIGHT-BEARING LATERAL FOOT
Functional Projection • Weight-bearing lateral view • Assessment of plantar arches
HORIZONTAL CENTRAL RAY
This is a unique projection where the central ray is directed horizontally towards a cassette placed vertically. It is essential to correctly align the tube to maintain perpendicularity with the plate.
Exposure Factors
Equipment: Without bucky (vertical plate). Position: Standing (Orthostatic).
Cassette Size
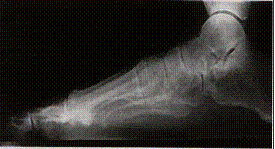
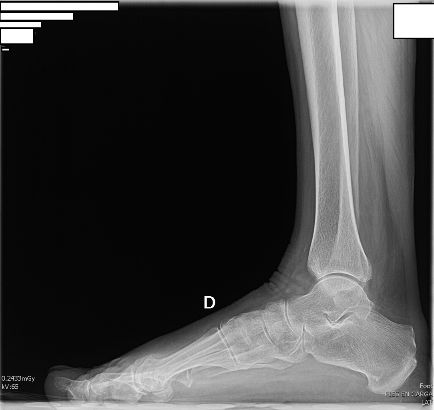
Visible Anatomical Structures
Plantar Arches
Medial and lateral longitudinal arches
Hindfoot
Calcaneus and Talus profile
Midfoot
Navicular, Cuboid, and Cuneiforms
Forefoot
Metatarsals and phalanges (superimposed)
- Lateral view of the entire foot from the calcaneus to the distal phalanges.
- Distal leg (approx. 5-8 cm of tibia and fibula).
- Ankle joint (tibiotalar) in lateral profile.
- Superposition of the metatarsals.
- Subtalar joint.
- Clear visualization of the soft tissues of the sole.
- Relationship between the talus and the 1st metatarsal (Meary's angle).
- Calcaneal pitch angle (calcaneal inclination).
Patient Positioning
CENTERING POINT
Level of the midfoot to include both the hindfoot and forefoot
Central Ray Direction
Horizontal and perpendicular to the cassette
Direction: Completely horizontal, parallel to the floor
Entry: Lateral side of the foot (Medio-lateral projection)
Exit: Medial side, towards the vertical cassette
Angulation: 0° (Strictly horizontal)
Patient Instructions
"Don't move, keep your weight on both feet"
Look straight ahead - Maintain balance without moving the feet
Clinical Indications
Safety Considerations
- Stability - Ensure there is no risk of falling
- Secure Block/Box - Verify it can support weight properly
- Comfortable Position - Avoid forced postures that may cause injury
- Radiological Protection - Increased distance due to vertical position
- Limited Patients - Assess the ability to stand without support
This projection requires closer technical supervision due to the unusual position